

This is pretty simple, yet I was somewhat confused at first. I decided to make a tutorial for anyone that doesn't really understand what's going on.
This tutorial is for the 5-speed manual transmission for either the Dodge Stratus, Mitsubishi Eclipse, Mitsubishi Galant, or Chrysler Sebring.
Refer to this video for a spacial view of where everything is and what to remove:
YouTube - How To: Replace V6 Throw-Out Bearing
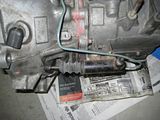
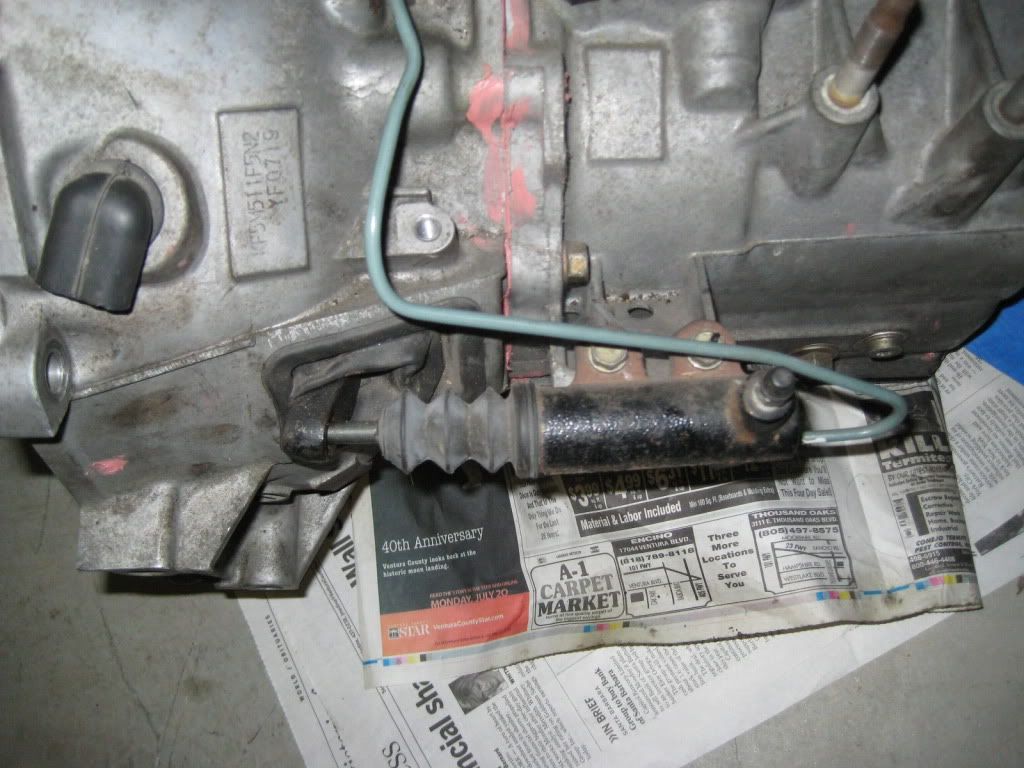
-Remove the slave cylinder
-Remove the cap on directly on top of the fork's pivot axle
-Remove the bolt holding the pivot axle in place
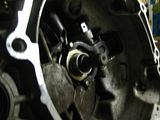
-Take note of the spring positions; there are rubber gaskets in between the fork and the springs
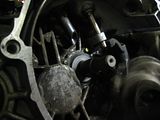
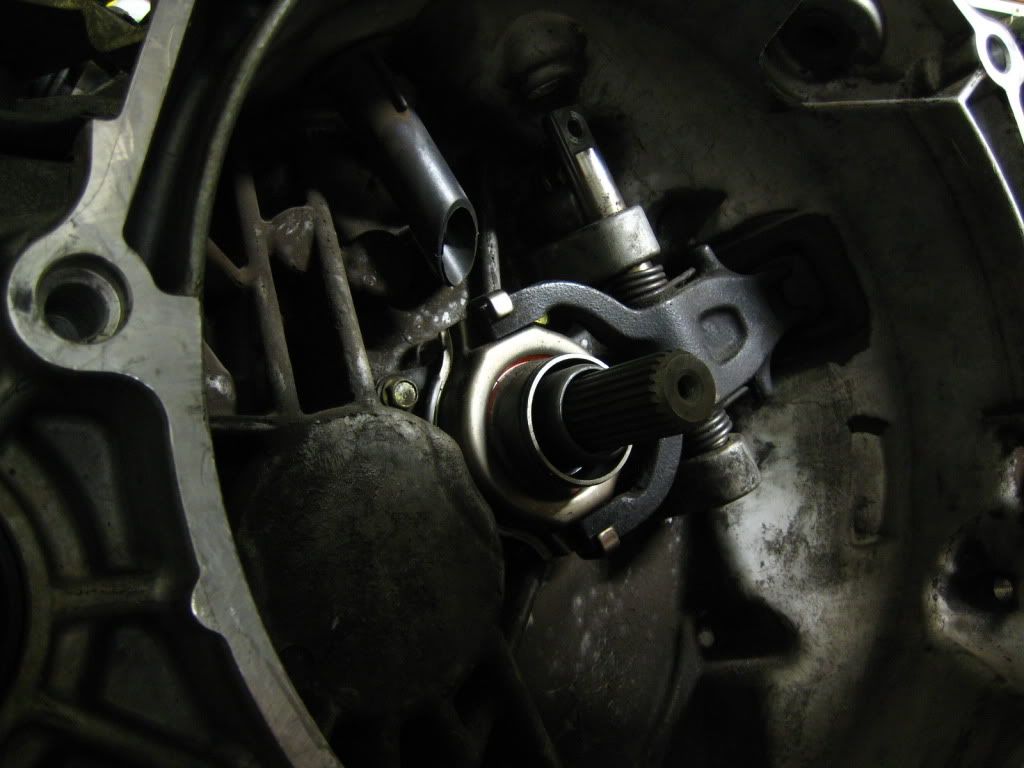
-Slide the pivot axle up and threw the hole. If it's hard to move, take anything that will fit in the hole (I found that an allen wrench worked really well for this) and push it up. It does not need to be unscrewed, though you may have to rotate it left and right to get it to move. The first picture was actually taken after the TOB was already replaced, so don't mind how the spring isn't set yet
->  ->
-> 
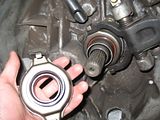
-Once the fork is completely off of the pivot axle, pull the fork far enough forward to remove the throw-off bearing
-Put the new throw-off bearing on the fork, and put the fork back in position
-Put the springs and gaskets back while sliding the pivot axle back down
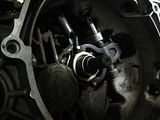
In this picture, you can see that the bottom spring isn't placed behind the fork yet, essentially not applying pressure. I found it easier to place it behind the fork AFTER the pivot axle was already through the spring. Common sense, but I had the spring applying pressure on the fork on the top spring when I was trying to line up the pivot axle and it was a real PITA. Could save you a couple minutes.
-Line up the hole on the pivot axle with the hole behind it, and then put the bolt back
-Replace the cap on top
This tutorial is for the 5-speed manual transmission for either the Dodge Stratus, Mitsubishi Eclipse, Mitsubishi Galant, or Chrysler Sebring.
Refer to this video for a spacial view of where everything is and what to remove:
YouTube - How To: Replace V6 Throw-Out Bearing

-Remove the slave cylinder
-Remove the cap on directly on top of the fork's pivot axle
-Remove the bolt holding the pivot axle in place

-Take note of the spring positions; there are rubber gaskets in between the fork and the springs
-Slide the pivot axle up and threw the hole. If it's hard to move, take anything that will fit in the hole (I found that an allen wrench worked really well for this) and push it up. It does not need to be unscrewed, though you may have to rotate it left and right to get it to move. The first picture was actually taken after the TOB was already replaced, so don't mind how the spring isn't set yet
->  ->
-> 
-Once the fork is completely off of the pivot axle, pull the fork far enough forward to remove the throw-off bearing
-Put the new throw-off bearing on the fork, and put the fork back in position
-Put the springs and gaskets back while sliding the pivot axle back down
In this picture, you can see that the bottom spring isn't placed behind the fork yet, essentially not applying pressure. I found it easier to place it behind the fork AFTER the pivot axle was already through the spring. Common sense, but I had the spring applying pressure on the fork on the top spring when I was trying to line up the pivot axle and it was a real PITA. Could save you a couple minutes.
-Line up the hole on the pivot axle with the hole behind it, and then put the bolt back
-Replace the cap on top